Uncategorized

Blog - Behind the Scenes Video - Why 1STRUCT?

Behind the Scenes of Our “Why 1STRUCT?” Video

We recently worked with the team at Capture Collective to create a video all about 1STRUCT! This video, which we’ve titled the ‘Why 1STRUCT?’ was designed to give our audience a look into who we are and why we’re so passionate about building beautiful Brisbane homes.

Since our inception in 2005, we’ve been incredibly passionate about crafting Sloping Lot Homes and Raise and Build Under Renovations across Brisbane. However, we recently realised that it’s difficult for our audience to see our day-to-day passion for the building industry and therefore know for sure that their new home is in great hands when building with 1STRUCT.

That’s why we’ve decided to create this video. We hope the final results will provide our viewers with a snapshot of our company and give them a better understanding of us – Michael and Ben, the two brothers who run this family business. We really want to demonstrate to our audience that 1STRUCT’s dedication to quality construction outcomes stems from our own passion for both the building industry and for achieving top-quality results in every single home we build.

We also wanted to highlight our friendly and approachable nature and high level of customer service; when you build with 1STRUCT you’ll work closely with Michael and Ben throughout the process to ensure a stress-free and enjoyable building journey. We also wanted to demonstrate our excitement for building luxury homes. When we talk about our projects, both past and present, the excitement on our faces is undeniable and this speaks volumes of our dedication to our work.

Our high level of customer service is also evident in our dedication to communication with clients. This is mostly done through our use of BuilderTrend and was another key thing we wanted to highlight in this video.

We had a lot of fun shooting this About Us film with the talented team at Capture Collective. Guy and Taylor were excellent to work with and we are so excited to share the results of this shoot with you all. We filmed many scenes of this video at one of our recently completed Raise and Build Under projects, which we hope will give you a great insight into our high-quality results.

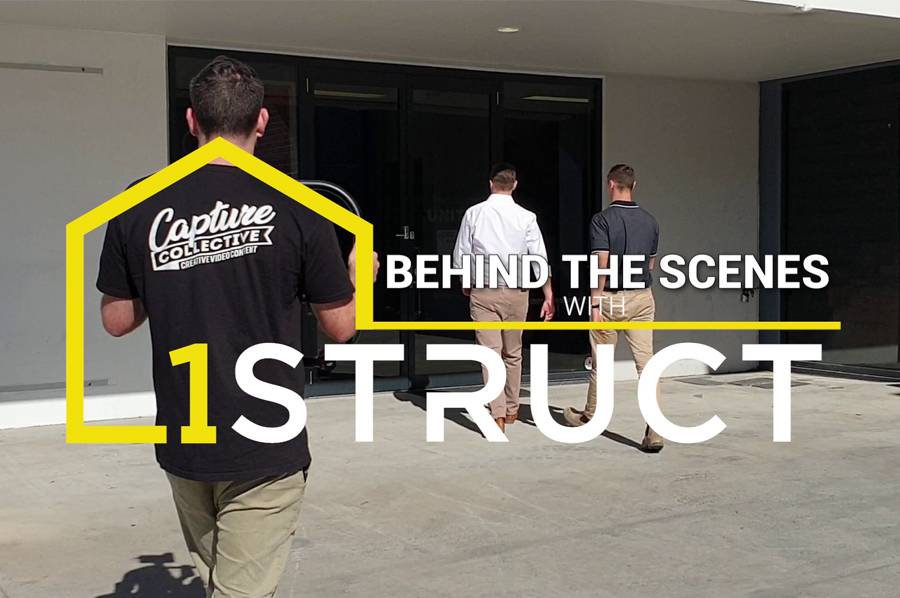
In the meantime, the Capture Collective team have put together this little behind the scenes compilation with some hilarious bloopers from the shoot! Check it out below!

We really hope this video gives you a better understanding of who we are behind the brand. At the heart of 1STRUCT is two guys with a vast passion for the building industry and for delivering dream homes to clients across Brisbane. We think this video perfectly reflects this message so keep an eye out for the finished product, coming soon!

If you’re interested in finding out more about building with 1STRUCT, you can also get in touch with us here.

Pre-Construction Phase

How Long Does the Pre-Construction Phase Take?

While it might seem boring or unimportant, especially in comparison to the excitement of actually building your dream home, a carefully considered pre-construction process is integral to the success of your project. The pre-construction phase is when you ensure your plans both meet your design criteria and also meet budget, which consequently determines that you can actually afford to build your project.

Pre-construction can take significant time, so it’s best to start planning as early as possible to avoid delays. It’s also imperative that you work closely with your builder throughout this stage to ensure the correct processes are followed and you avoid redesigns and re-lodgement fees, saving yourself time and money.

The Standard Pre-Construction Process

Traditionally, pre-construction includes the following steps:

  1. Assess project criteria and requirements
  2. Design architectural plans (includes concept and preliminary plans and working drawings)
  3. Completion of finishes schedule
  4. Lodge for Development Approval (DA)
  5. Completion of engineering plans
  6. Price supplied by your builder

A common mistake is for clients to wait until the end of this process to approach a builder. Doing things in this order can lead to your plans being way over budget, which means they will need to be redesigned via collaboration between the builder, client and designer. An amended Development Approval may also need to be lodged, all of which will add time and money to your project.

With access to so much architectural inspiration via sites like Pinterest and Instagram these days, it can be very easy to over spec designs without fully understanding the costs involved. This is why it’s best to have your builder engaged from the very beginning of the pre-construction phase to ensure your home is actually achievable and fits your budget.

The process of adjusting plans and scope to fit the budget adds significant time and extra costs to your project. This process includes:

  • Investigating cost saving options
  • Deciding upon cost saving option of choice
  • Amending plans and finishes schedule
  • Finalising price of project
  • Lodging for amended Development Approval
  • Signing contract
  • Starting construction

The 1STRUCT Design + Cost Process

After witnessing the heartbreak of so many clients who approach us with stunning plans that are simply far too expensive for them to create, we have created a process we call Design + Cost.

This process means 1STRUCT are involved from the beginning of a project and can cost plans throughout the design stage to ensure they are on track and aren’t overdesigned. This service also ensures you won’t be hit with hefty redesign fees or re-lodgement fees to amend Development Approvals.

Our Design + Cost Process includes the following steps:

  1. Take time to understand your budget
  2. Assess project criteria and requirements
  3. Design architectural concept plans
    • Complete initial site investigations
    • Client completes request for information with detailed project requirements
  4. 1STRUCT completes building estimate (includes trades performing a site visit to understand conditions and real-world scope of works)
  5. Design preliminary architectural plans
  6. Completion of finishes schedule
  7. 1STRUCT completes building estimate
  8. Lodge for Development Approval
  9. Design architectural working drawings
  10. Adjustments made to finishes schedule
  11. Drawing of engineering plans
  12. 1STRUCT completes final building proposal
  13. Sign contract
  14. Start construction

When Should You Start Planning?

The honest answer is now – it’s never really too early to begin planning your home, but the timing of approaching a builder will depend on when you want to begin construction. Let’s say you want to start building in September 2019, you will need to start planning NOW to ensure your home’s build journey is smooth, cost-effective and to your expectations.

Remember, pre-construction takes time so it’s imperative that you enlist your builder of choice as soon as possible so you can work closely together to ensure the correct processes are followed and you avoid unnecessary wastage of time and money.

Project Success

If you’re nearly ready to launch into the pre-construction process, 1STRUCT can help. We can offer guidance and support in the early stages of your project and assist you through the pre-construction process and into construction.

For more information or to find out more about 1STRUCT’s unique Design + Cost Process, get in touch with us today.

Summer Giveaway Winner

WINNER – Summer Giveaway Competition

Our Summer Giveaway Competition has closed, and we are super excited to announce the winner.

Firstly, we would like to thank our great partners at Argent for partnering with us and providing the magnificent prizes.

Now to drawing the winner, see below a video of the draw.

And without further a due the winner is ………………..  Adrienne Noble

Competition Winner Photo

Congratulations Adrienne on winning this fantastic prize. We will be in touch to arrange getting this fantastic plumbing ware to you soon.

Thanks again to everyone who entered our Summer Giveaway, find out more about the Summer Giveaway Competition here. Keep an eye on our website and social media pages for our next competition.


Take care and speak soon,

Michael & Ben

An Insight Into 1STRUCT’s Client Portal

An Insight Into 1STRUCT’s Client Portal

Project management software is an excellent way to stay informed of what’s happening on your build site. The industry leader in construction management software is known as Builder Trend and is utilised by 1STRUCT for our client portals.

As one of 1STRUCT’s key communication methods during a project, we wanted to give a bit of an insight into the software and highlight a few of its most useful features.

Builder Trend is a cloud-based software that connects you with your builder, tradesmen, suppliers and other professionals involved in your project. It’s a space where centralised information about your project can be stored and you can view images and videos of the project as well as check daily logs and timelines in real time. Your client portal can be accessed on your mobile phone or tablet or via the website on your computer, so you have access to project information at all times.

There are nine key areas of 1STRUCT’s Client Portal that help you and your builder work together and communicate to complete your project on time and to the highest standard.

To-Do’s

The first section is To-Do’s. Understandably, there are thousands of to-do’s that need to be actioned over the course of any project. The To-Do’s section of your client portal allows you or your builder to create a To-Do that addresses a particular item or decision.

You can add a title, notes, and priorities, due dates, reminders and assign a particular person to investigate the item. The software also allows you to create a more detailed checklist and add documents that relate to the To-Do.

Once the To-Do has been created, assigned users can then use the messaging function to discuss the item, air and answer any questions and finalise the To-Do. Once finished, the item can be marked as completed.

You can view a summary of all your To-Do’s in a table within the client portal. These items can be filtered and sorted so you can stay on top of the important items, meet deadlines and organise responsibilities within the build.

Schedule

This section allows you to view the upcoming schedule of building events that are taking place on-site, so you always know what’s happening. The schedule can be viewed in calendar, list or Gantt view. Certain events can be clicked into and messages can be added regarding any items, if required.

To-Do deadlines are also shown on the schedule as a reminder of when things are due.

Daily Logs

Notes on key events, meetings and discussions held on-site are logged via this section of the portal. Logs, associated photos, documents and messages can all be accessed via the Daily Logs tab.

Documents

Important documents that are relevant to your project, such as architectural drawings, engineering plans, energy reports and finishing schedules are stored in this section of the client portal for your convenience. You can download these files to view or make comments, queries and notes on documents in the client portal, where necessary.

Videos

Any videos that are taken on-site are stored in this section of the software. Videos can be downloaded to view and comments, notes and queries can also be made on the video.

Photos

Similar to the videos tab, images taken on-site are shown under the photo tab of the portal. You can view photos and make comments regarding any queries you may have on individual photos.

Comments

This tab allows you to see a summary of comments on all items, including To-Do’s, schedule, daily logs, documents, videos and photos.

Warranty

Once your project has been completed and you’ve moved into your new home, defective items can be lodged through the warranty tab. To enter a defect, simply click New Claim, add a title, select a category and a priority and add a description. You can also include attachments such as photos, drawings or plans.

Once a defect is saved and agreed on, you can add begin messages to discuss any issues with relevant tradesman and schedule times for them to come and rectify defects. The warranty summary page also shows you a complete list of defects along with their status, priority and next appointment date.

Summary

Finally, a handy summary tab gives you an overview of your entire project with a snapshot of latest information from all the areas of the software.

____

Our client portal is an excellent way for your builder to keep you informed of your project at all times. With centralised storage of messages, queries and comments and the ability to post up to date photos and videos, 1STRUCT’s portal is the best way to ensure you, your builder, tradesmen, suppliers and other professionals are all on the same page with your project at all times.

For more information on project management software or to find out more about how 1STRUCT uses this in practice, get in touch with us today.

Three Ways Your Builder Should Keep You Informed During Your Project

Three Ways Your Builder Should Keep You Informed During Your Project

A good builder will keep you informed of what’s happening with your build throughout your project. A great builder should keep you so up to date with what’s happening it’s as if you are on site regularly. When it comes to building your own home, it’s important that you understand where your project stands at all times so you can keep track of the build, keep organised with decisions and be ready for move in day before it comes around.

There are many ways a builder can keep you up to date with your project, including using project management software, site meetings and of course, good old phone calls and emails. Most builders will use a mixture of these communication methods throughout the project so we’ve explained the function of each and how 1STRUCT communicate in more detail below.

Project Management Software

When it comes to project management, 1STRUCT uses an industry leading construction management software known as Builder Trend. Functioning as a client portal, this software allows you to log in on your mobile phone, tablet or computer and check the progress of your project at any time, day or night, by viewing images and videos and checking daily logs and timelines.

With data uploaded from your build site every few days, project management software makes it easy for you to stay on top of what’s happening with your build. It also offers to-do, document, message and comment sections, which allow you to communicate with your builder directly and keep a log of all communications in one central location.

To find out more about 1STRUCT’s Client Portal, read our blog post here.

Traditional Means

While it may seem outdated there’s certainly a time and place for phone calls in the building process. A quick phone call is a great way to ask a simple question or for an update on what is happening on site. They can also be useful for urgent or detailed discussions regarding a specific topic.

Emails are also essential throughout the process and are handy for more lengthy forms of communications or when numerous documents must be sent over. Emails are also great for keeping a paper trail of communications, which can be useful for both parties to refer back to and can help clarify things throughout the project.

Site Meetings

Site meetings are such an important part of the communication process between owner and builder as they allow you to view progress and finishes with your own eyes. Site visits also allow you to discuss any decisions that are hard to visualise off site or which may have arisen during construction.

Most builders will schedule site meetings roughly every three weeks and at any important stages of the build, such as frame stage, electrical rough-ins and carpentry fit-offs.


When constructing your dream home, you want to be kept in the loop of what’s happening on site at all times. This is even more important if you are separated from the site due to living interstate or travel frequently for work. A good builder should work with you to keep you informed through a variety of means, including phone calls, emails, project management software and face-to-face site meetings. This is the best way to manage expectations on both ends, ensure you get your desired finishes and make sure the building journey is pleasant and enjoyable for all.

If you want to know more about how your builder can keep you informed of what’s happening on your site, get in touch with 1STRUCT today!

Final Steps To Construction

Final Steps To Construction

At 1STRUCT, we want to ensure the entire building process is completely transparent for anyone looking to undertake a construction project. To ensure you’re educated and informed about your very own build, we’ve put together this post with everything you need to know about those final steps before your project begins.

Here is a list of the The Final Steps Just Prior To Construction with more detailed information on each of the specific steps further below.

  1. Finalise scope and budget with your builder
  2. Peruse drafted contract documentation
  3. Final contract is drawn up and signed with a project timeline and payment schedule
  4. Client provides proof of title of the land, and loan approval documents or proof of funds
  5. Client organises deposit payment
  6. Builder processes QBCC Insurance and Q-Leave
  7. Building Approval is issued
  8. Construction begins


Finalising Scope and Price 

One of the final steps is to finalise your scope and price. Your builder should take the time to work closely with you to review the detail of the entire project and your anticipated inclusions and exclusions. This is a chance for you to identify any areas where you would like to save money, and consider areas where you may like to spend more in order to achieve a higher quality finish to match your vision.

This process is essential to ensure your budget, build cost and vision for the project align and allow everyone to be on the same page in terms of the final scope and budget.


Contract Documentation 

Once you’ve agreed on the final scope and price of the build, contract documentation can be drafted. Your builder will send you a copy of a draft contract (usually a HIA or Master Builders) along with a project timeline and payment schedule for you to peruse and give a final check over the scope of works and specifications.

Any required contract alterations are made and once you’re happy with the contract detail, your builder will then send through a final draft copy. It is at this point that you will need to provide the following:

  • Proof of title of the land (i.e. rates notice, electricity bill, water notice etc); and
  • Loan approval documentation or proof of funds

After you’ve submitted these documents the builder prepares the final documentation and the contract is signed.

Deposit & Building Approval 

After the final contract has been signed, the deposit payment is due. Once the deposit has been transacted your builder can execute QBCC (Queensland Building and Construction Commission) Insurance and Q-Leave payments, These certificates are then supplied to the certifier to facilitates the issuing of Building Approval.

If you are financing your project with a construction loan, deposit payment can take up to a week to be processed. It’s always a good idea to chat with your bank manager to find out your bank’s processes before you organise to pay the deposit.

Often your lending consultant will require a copy of the signed contract, approved plans and Building Approval before they can release any funds. However as noted above, before Building Approval can be issued you will need to have put down a deposit to facilitate Q-Leave and QBCC certificates. This means you may need to pay the initial five per cent deposit payment out of your own pocket. Once you have approval, your loan will be released and building can commence.

If you are funding the entire project yourself, you should always inform your builder, as there may be a separate set of processes for this path. At 1STRUCT we have unique processes for each of these paths so it’s important that we are aware of your payment plan from the earliest stage possible.


Begin the Build

Once all of the above steps have been ticked off your builder can commence works onsite. It might seem like a confusing process, but it is relatively simple when explained clearly and when you are dealing with a quality builder. Remember, your builder is there to help you and should be able to answer any questions you may have about the construction process at any stage of the project.


If you want to know more about the final steps to construction or simply want to find out how 1STRUCT can help kick-start your very own build, get in touch with us today!

How To Raise a House Title Image

How To Raise a House

One way to introduce more space into a renovation is to raise the existing house and build in underneath. This construction method can be used on timber-subfloor homes which are very common throughout Brisbane, with a particular style of this type of home (see pictures directly above & below) named a “Queenslander” after the State.

This construction method involves demolishing the lower level of the structure, raising the house and building in underneath. It allows the new space of the home, often doubling the size of the house, to be created below the footprint of the existing home without encroaching on the back and front yards.

Lifting an existing home requires a lot of forethought and planning. Here’s an overview of the process:

1 – Existing versus proposed plan analysis

  • Compare existing and proposed plans to identify if the house requires repositioning (known as raise and slide) and how the existing structure needs to be modified
  • Plan the sequence of events and site-specific works that will best suit transitioning from the current to proposed structure.

2 – Complete site surveying

  • Engage a surveying company to obtain pins on-site, distinguish boundaries and determine the proposed house location and floor heights.

3 – Check existing structure location against surveying points

  • Set up profiles on-site based on the surveying points in order to double check calculations from Step 1 match the actual measurements on-site.

4 – Pre-raise demolition and asbestos removal (if required)

  • If required, engage specialist asbestos demolition company to remove any asbestos materials from site.
  • Demolish required building components including internal walls, ceiling linings and external walls, leaving required structural elements to support the existing structure.

5 – Install steel beams

  • Engineer-specified steel beams are required for the new structure to facilitate the raising of the house. These are installed and form an essential part of the new foundations.
New Steel Beams Under Existing Structure

6 – Timber styes installed to take load of structure

  • Timber styes (Jenga-like pieces) are installed underneath the existing structure to make contact with the steel beams. They will take the load of structure.

7 – Disconnection of posts

  • Now that the timber styes support the house, the remaining post supports are disconnected.

8 – Lift house with hydraulic jacks

  • Multiple hydraulic jacks (a more advanced version of a car jack) are placed around the structure under the steel beams.
  • Two teams use the jacks to push the house up on one side by approximately 100mm.
Hydraulic Jack To Raise The Structure

9 – Install styes to take load of house after 100mm raise

  • More timber styes are installed under the newly raised section to support the structure.

10 – Repeat step 8 & 9 until relevant height reached

  • The other side of the house is raised in the same manner. The teams keep repeating Steps 8 & 9 until the full raise height is reached.
  • The structure is raised an additional 20mm to facilitate the structure being lowered onto the new posts later in the process.

11 – Earthworks

  • Earthworks machines are deployed on-site to clear the required building components such as the old concrete slab and any posts.
  • The post holes for the new steel posts are then dug with the Earthworks machine in preparation for the installation with concrete.

12 – Hang posts and concrete posts into holes

  • Once the holes are dug measurements can be taken for the new steel posts.
  • The steel posts are delivered to site, placed in position, waterproofed and secured into place with concrete.
Hanging of posts prior to concreting

13 – Remove styes

  • The hydraulic jacks are placed into position to take the load of the structure and the timber styes are removed.

14 – Drop the house onto posts

  • The hydraulic jacks then lower the structure to the correct height to be secured to the steel posts.
  • A welder then welds the steel posts to the steel beams to fix the structure together.
  • The hydraulic jacks are removed as the final steel posts now support the structure.

15 – Job done!

House After Raise & Posts Installed

Time Lapse Footage of Raising a House

Click the below video to see time lapse footage of the entire house raise process.

Renovation Display Open Home

On Saturday we held an Open Home of our award winning Renovation Display at Coorparoo.


The Event

Visitors were able to look through the raised and built under home to obtain an insight into the quality workmanship of 1STRUCT and also discuss their own construction projects. We had around 40 people visit the home on Saturday to view our high-quality finishes and discuss the design and construction with our expert team. Mother nature turned it on with an amazing late winter, blue sky, 28-degree day.

Our team answered many questions regarding the design and construction of the project and specifically how it related to visitors’ own projects. Holding these discussions in a completed renovation allowed visitors to envision their potential raise & build under projects and get a feel for space and scale. Guests were able to view the creative finishes, concepts and materials used to gain inspiration for their own dream homes.

The designer of the house, Jamin Yarrow of Jamin Building Design, was also present which allowed visitors to discuss more in depth some of the design features of the home and get some helpful tips for their own projects.

Luck Door Prize Winner

We had a bottle of Veuve Clicquot as a lucky door prize for one lucky guest. See the below video for the drawing of the prize.

Congratulations Tom on the win, enjoy the champagne.

A quick thanks to everyone who came to view our Raise & Build Under Display Home. We hope it gave you some good ideas and was helpful in moving forward with creating your dream home. Keep an eye out for our next event.

If you were unable to attend our open day and would still like to see the display then please give us a call on (07) 3907 0050 or send us an email at info@1struct.com.au to make an appointment with us.


Thanks,

Michael & Ben Davis

2018 HIA Bathroom & Kitchen Awards

2018 HIA – Kitchen & Bathroom Award Entries

The 2018 HIA Kitchen & Bathroom Awards are just around the corner and 1STRUCT has one entry in each the kitchen and bathroom categories.


1STRUCT’s entries in this years running of the awards are from our soon to be released Luxury Sloping Lot New Home Display. See below more information on each of these fabulous living spaces with a sneek peak of each.

Kitchen Entry

The centrepiece of this amazing kitchen is a Smartstone Calcutta Blanco stone with cut through 30mm Black Bean timber island bench. Sitting atop is a Dorf Inca Mixer with Argent Double Sink. Opposite the stainless-steel benchtop starring a gas cooktop with matching Miele dual ovens and range hood. The Wilsonart Columbian Walnut open shelves complement the matching concealed walk-in pantry wall.

All of the above features combine to create a stylish but timeless look & feel. Set within a spacious high ceiling part of the home and with intricately designed practicality, this kitchen really is a potential award winner.

2018 HIA Awards 1STRUCT Kitchen Entry

Other Kitchen Features

  • Floating shelves in Wilsonart Columbian Walnut
  • Hidden walk-in pantry wall Wilsonart Columbian Walnut
  • Industry Matt White 200 x 600 Tiled Splashback
  • Mirrored kick boards
  • Clever Choice Elegant Oak Champagne flooring

Bathroom Entry

Your first sight is an open shower with cedar timber ceiling overhead viewing through the wall to wall window. Sitting aside a palatial square bath sitting atop feature tiled stairs. The floor to ceiling marbled tile is scattered with luxurious Argent and Villeroy & Boch plumbing fixtures. Warm Tassie Oak timber wraps the cabinetry and accentuates the above bench basins.

2018 HIA Awards 1STRUCT Bathroom Entry

Other Bathroom Components

  • Large square bath with stepped entrance.
  • Extruding shower tiled shelves.
  • Semi-recessed shaving cabinets
  • Floor to ceiling entrance door
  • Separate toilet

Wish us luck on the awards night.

Brand Renovation

1STRUCT is back and better than ever, after an exciting brand relaunch. With a redesigned logo and revised brand identity, every aspect of 1STRUCT now reflects the current vision and future of the business.


Our Name

Importantly, the business name has remained the same throughout this exciting transformation. 1STRUCT was chosen specifically as founders Michael and Ben Davis wanted the company to be number one in its niche field of construction. Thirteen years on and this vision remains the same – while 1STRUCT has developed a reputation for quality construction outcomes and exceptional customer service, there is always rooms for improvement. This means ‘1STRUCT’ remains the best fit for the company.

1STRUCT has become a reliable household name for building luxury sloping lot homes and raise build under renovations in metro Brisbane. The company has become synonymous with quality, care and luxury and the new logo and re-imagined brand identity have built upon this.

Before

After

Logo

The new logo needed to mirror the quality of the service, workmanship and luxury finishes that 1STRUCT is known for. “It had to reflect where 1STRUCT has come from, but also represent where we stand today as a trusted, modern, quality Brisbane building company,” said Michael.

Having been in business for more than a decade, Michael and Ben knew it was time for a change and a contemporary logo that reflected the maturation of the business. “It was time our logo was updated to match the progression of our business over the last 13 years,” explained Ben.

1STRUCT has come a long way since it was founded in 2005 – processes have been improved and modern technologies and software have been implemented wherever possible. The new and improved logo was designed to reflect this, as well as the brand’s relentless commitment to clients, passion for quality and dedication to exceeding expectations.

Brand Identity

This was also an excellent opportunity to reassess the brand’s identity. All 1STRUCT branding now reflects the team’s extensive knowledge of the industry, and experience in building luxury homes and renovations on sloping sites.

The updated brand identity also reflects Michael and Ben’s passion for construction and luxury property. The synergy of the brothers’ complimentary skills, allows 1STRUCT to offer high quality construction alongside great customer service and now, both the logo and brand identity match these offerings.

Thanks to an exciting brand relaunch, 1STRUCT now has a physical reminder of their exceptional brand, which values client satisfaction and quality finishes above all else. With this solid branding foundation, 1STRUCT can now move on to bigger and better things. For example, the launch of a Luxury Sloping Lot display home, which will beautifully complement the Raise and Build Under display home. Keep an eye on the website to find out more information.

To find out more about how 1STRUCT can help you create your very own dream home on a sloping lot, contact us today.